-
-
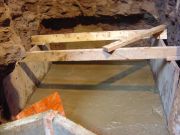
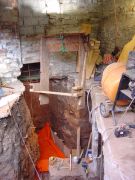
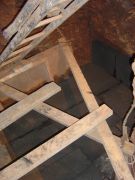
Flat sand base for a retaining wall panel's base. The wood above is for me to clamber around on during construction so I don't stand on the foamglas.
-
First few pieces of foamglas in.
-
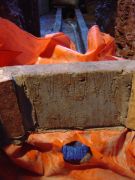
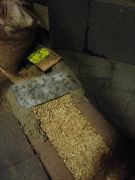
Sand behind the vertical board to give uniform support against the rock.
-
Three horizontal and two vertical layers of foamglas give the correct U-value (insulation value).
-
-
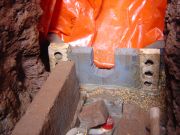
The plastic layer above the foamglas is in place. The form work is being lowered into the basement.
-
Formwork in place.
-
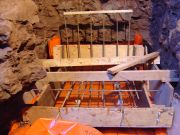
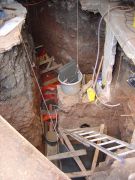
The first steel cage was built else where and lowered into place. The others will be constructed straight into the form work as it's really hard to lower them from upstairs as they are heavy and they move about and need loads of re-tieing to straighten them once in place.
-
-
First base in place.
-
Second base's foamglas goes down.
-
-
Second base is complete.
-
-
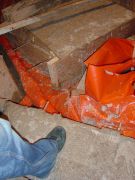
Radon barrier cut for soil pipe.
-
Soil pipe in place.
-
-
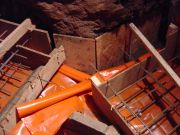
Flat and level sand base for 3rd and 4th panels. These will be poured as one concrete slab.
-
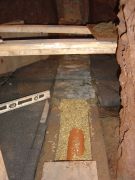
Foamglas layer one for the 4th panel. It is close to the sewer conduit.
-
-
-
-
-
-
Slates ontop of the pea gravel. These don't support any load but give a flat surface for the top layer of foamglas.
-
-
Half way along the conduit with the slates.
-
-
3rd and final layer of foamglas in place.
-
Foamglas is extremely brittle and must be laid very flat. No more then a couple of mm over a meter.
-
Ready for the DPM layer. This is not actually needed on top of foamglas but as its virtually impossible to tell if the foamglas has cracked I might as well add a polythene layer as the fourth DPM. I'm using a visqueen radon barrier as I needed a couple of sq. meters but could only buy 100 sq. m.
-
-
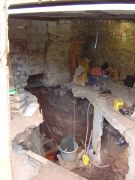
The structural engineer inspects my steelwork and looks at how to stabalise the building during the next phase.
-
The day of the first concrete pour. The first 4 retaining wall bases will be filled with 3.8 tonnes of concrete. A concrete pump is needed as the furthest panel is out of reach of the pouring spout of a concrete delivery lorry.
-
Concrete arrives and the stress starts for me.
-
-
Concrete is poured from the mixer into the hopper at the back of the concrete pump lorry.
-
-
It was too stressful to take photos of the pour this time mainly because the shuttering I used buckled a bit. Lesson learnt. Here is me the next day proudly jumping on the first concrete bases.
 Flat sand base for a retaining wall panel's base. The wood above is for me to clamber around on during construction so I don't stand on the foamglas.
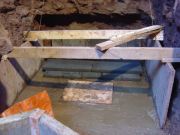 First few pieces of foamglas in.
 Sand behind the vertical board to give uniform support against the rock.
 Three horizontal and two vertical layers of foamglas give the correct U-value (insulation value).
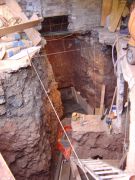
 The plastic layer above the foamglas is in place. The form work is being lowered into the basement.
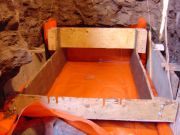 Formwork in place.
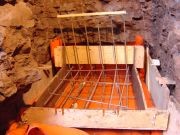 The first steel cage was built else where and lowered into place. The others will be constructed straight into the form work as it's really hard to lower them from upstairs as they are heavy and they move about and need loads of re-tieing to straighten them once in place.
 First base in place.
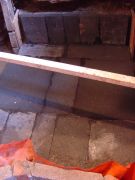 Second base's foamglas goes down.
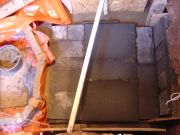
 Second base is complete.
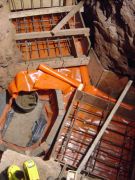
 Radon barrier cut for soil pipe.
 Soil pipe in place.
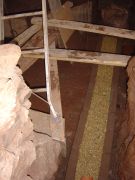
 Flat and level sand base for 3rd and 4th panels. These will be poured as one concrete slab.
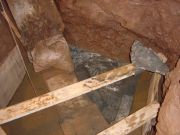 Foamglas layer one for the 4th panel. It is close to the sewer conduit.
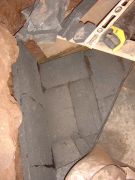

 Slates ontop of the pea gravel. These don't support any load but give a flat surface for the top layer of foamglas.
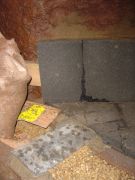
 Half way along the conduit with the slates.
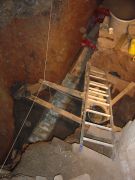
 3rd and final layer of foamglas in place.
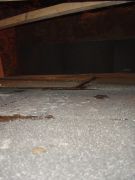 Foamglas is extremely brittle and must be laid very flat. No more then a couple of mm over a meter.
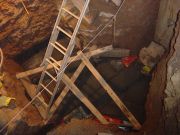 Ready for the DPM layer. This is not actually needed on top of foamglas but as its virtually impossible to tell if the foamglas has cracked I might as well add a polythene layer as the fourth DPM. I'm using a visqueen radon barrier as I needed a couple of sq. meters but could only buy 100 sq. m.
 The structural engineer inspects my steelwork and looks at how to stabalise the building during the next phase.
 The day of the first concrete pour. The first 4 retaining wall bases will be filled with 3.8 tonnes of concrete. A concrete pump is needed as the furthest panel is out of reach of the pouring spout of a concrete delivery lorry.
 Concrete arrives and the stress starts for me.
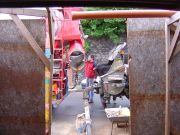
 Concrete is poured from the mixer into the hopper at the back of the concrete pump lorry.
 It was too stressful to take photos of the pour this time mainly because the shuttering I used buckled a bit. Lesson learnt. Here is me the next day proudly jumping on the first concrete bases.